PMRWorkspacesWindow plugin
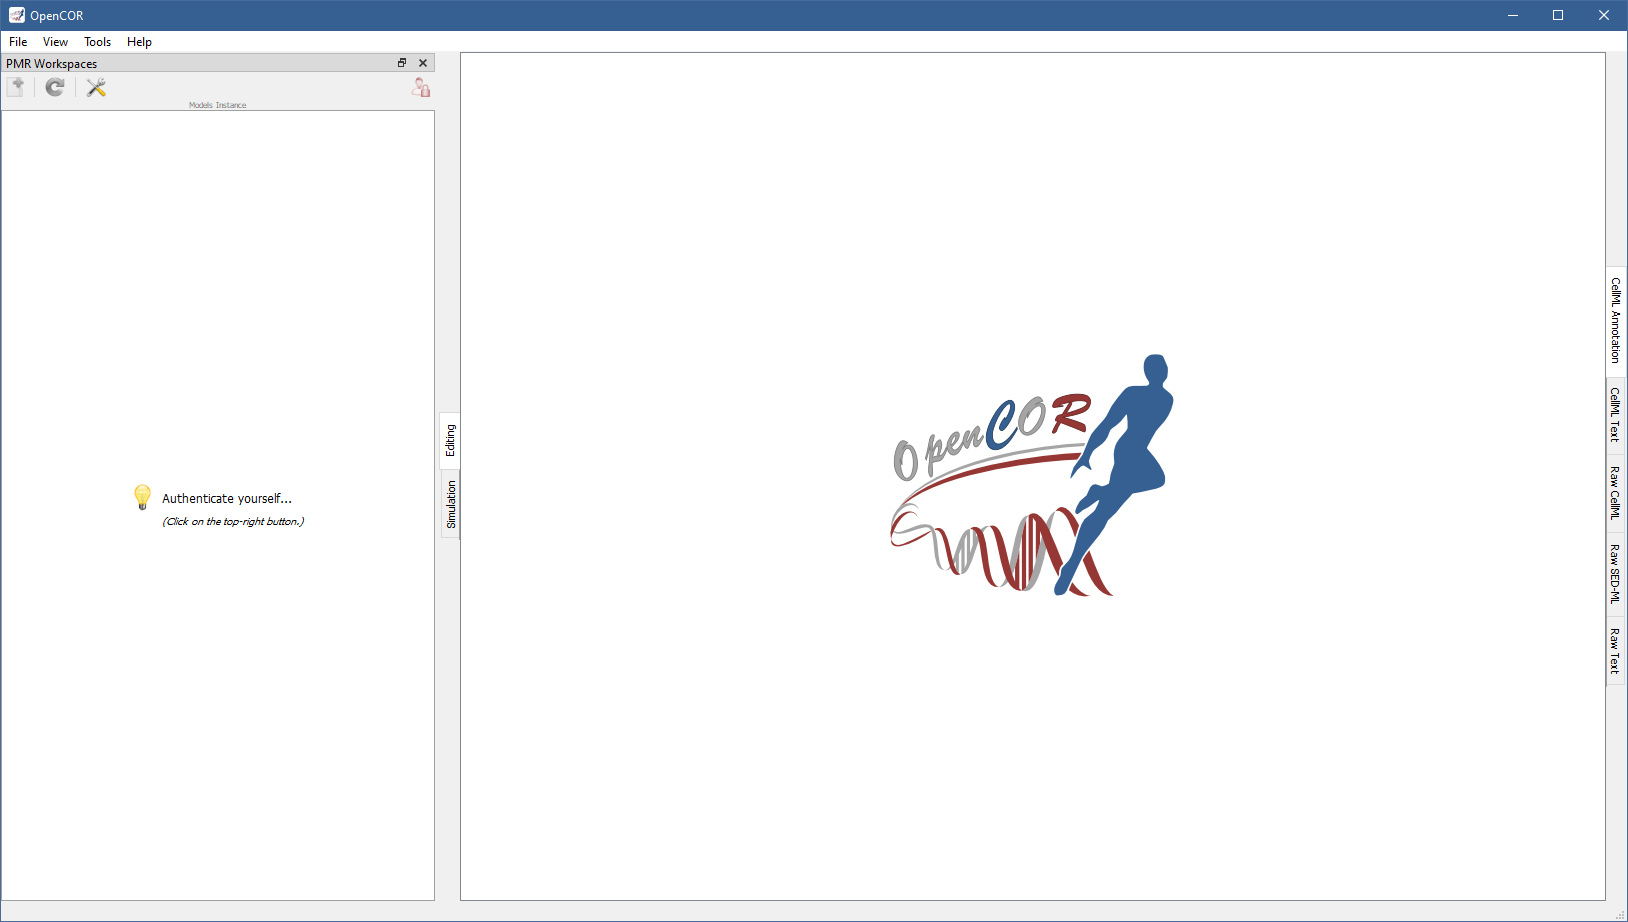
The PMRWorkspacesWindow plugin gives you access to your PMR workspaces. By default, it looks as follows:
The following topics are covered:
Instances of PMR
There are three instances of PMR:
Models instance: everything on this instance is permanent and persistent. It is always up and always stable.
Staging instance: it is used for public testing/preview of PMR developments. Data on this instance is wiped periodically whenever a new public testing/preview of the PMR software suite is released for the required testing exercise.
Teaching instance: the functionality of this instance should match the models instance, but without the data persistency guarantees. While data on this instance is also not permanent, any wipes to data stored will be announced on the cellml-discussion mailing list.
Both the models instance and the teaching instance require you to create an account before you can start interacting with them. On the staging instance, your models instance account may work, but if not then you need to create an account on the staging instance.
Specify an instance of PMR
You can specify which instance of PMR to use by clicking on the  button in the tool bar, or by selecting the
 Tools | Preferences... menu item and then the PMRSupport section:
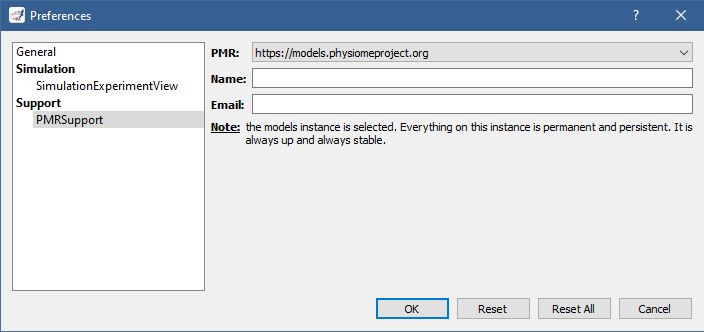
This is also where you must specify your name and email address, if you want to be able to synchronise your workspaces with PMR.
Log on to PMR
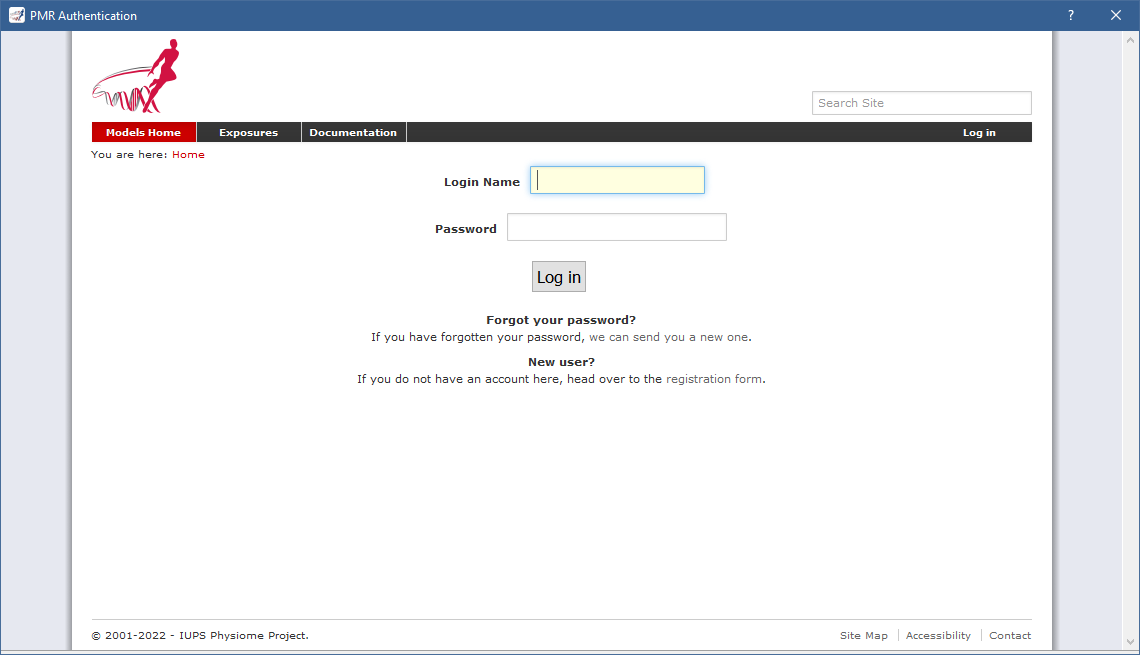
To log on to PMR, you need to click on the  button in the tool bar.
This brings up a window inviting you to log in to PMR:
button in the tool bar.
This brings up a window inviting you to log in to PMR:
Logged in, you can grant OpenCOR access to PMR by clicking on the Grant access button:

This closes the window and replaces the button with the  button, and displays a message indicating that no workspaces were found:

Make a local copy of a public workspace
The PMR window lists published exposures, which reference a specific state of a public workspace.
Say that you want to experiment with the Hodgkin–Huxley model.
You can do so by switching to the teaching instance (see above), looking for the Hodgkin–Huxley model, right clicking on it and by selecting the Make Local Copy... menu item:

You need to provide the path to an empty folder. The local copy completed, you can double click on it to reveal its contents:

Create a new workspace
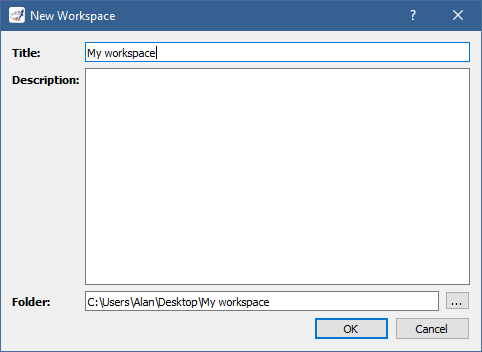
You can create a workspace by clicking on the  button in the tool bar.
You need to provide both a name and the path to a folder (it does not have to be an empty folder).
You may also provide a description:
button in the tool bar.
You need to provide both a name and the path to a folder (it does not have to be an empty folder).
You may also provide a description:
Any file already present in the folder will be considered new. For example, if you provide a folder containing the models shipped with OpenCOR, you will get something like the following upon creation of the workspace:

The model files are preceded by the  icon, meaning that they are indeed new, while the workspace folder is preceded by the
  icon, meaning that it is owned by you and that it contains changes that have yet to be synchronised with PMR (see below for a full list of possible icons).
Synchronise with PMR
Your workspace created, you may want to syncrhonise it with PMR.
This is done by right clicking on any of the files/folders in your workspace and by selecting the Synchronise Workspace With PMR... menu item.
This brings up a window where you can see which files have changed and what exactly has changed.
For CellML files, changes can be seen using either the CellML Text format or the raw CellML format (i.e. XML-based).
Simply toggle the  button as needed:
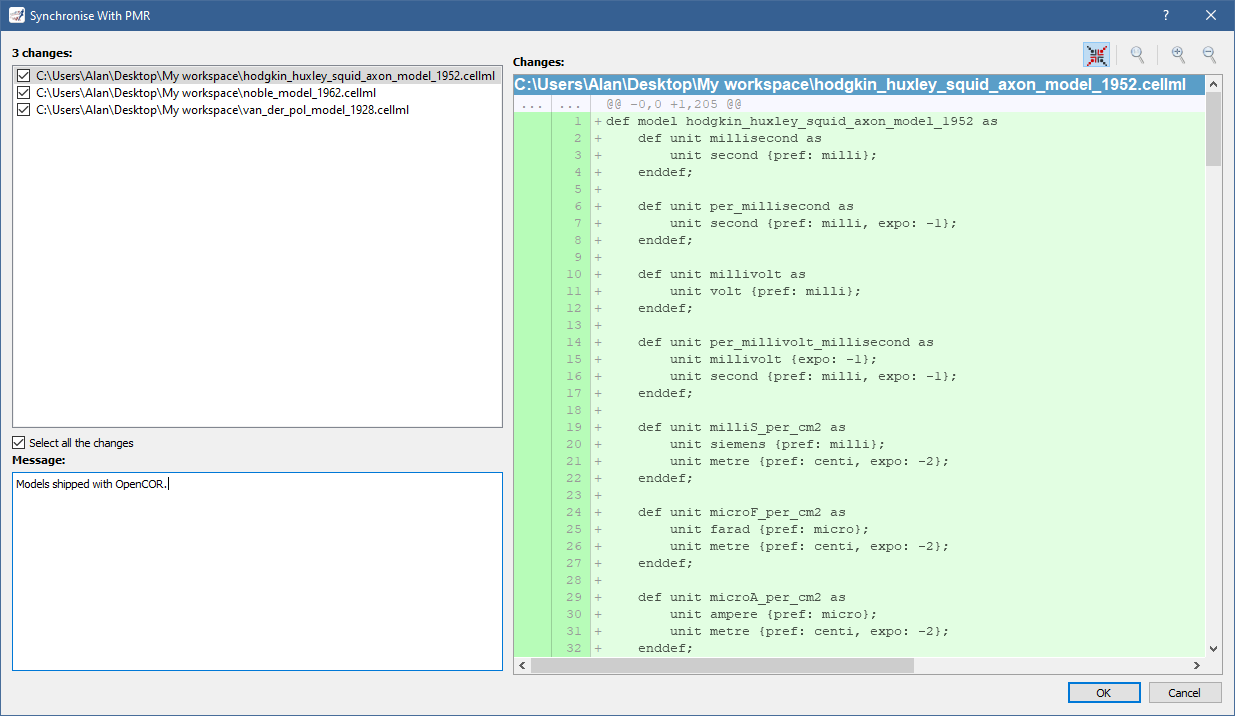
Provide a description for your changes and click on the OK button to synchronise your workspace with PMR.
The model files are now preceded by the  icon and the workspace folder by the
  icon:
icon:

You can check your workspace in PMR by right clicking on any of the files/folders in your workspace and by selecting the View Workspace In PMR... menu item:

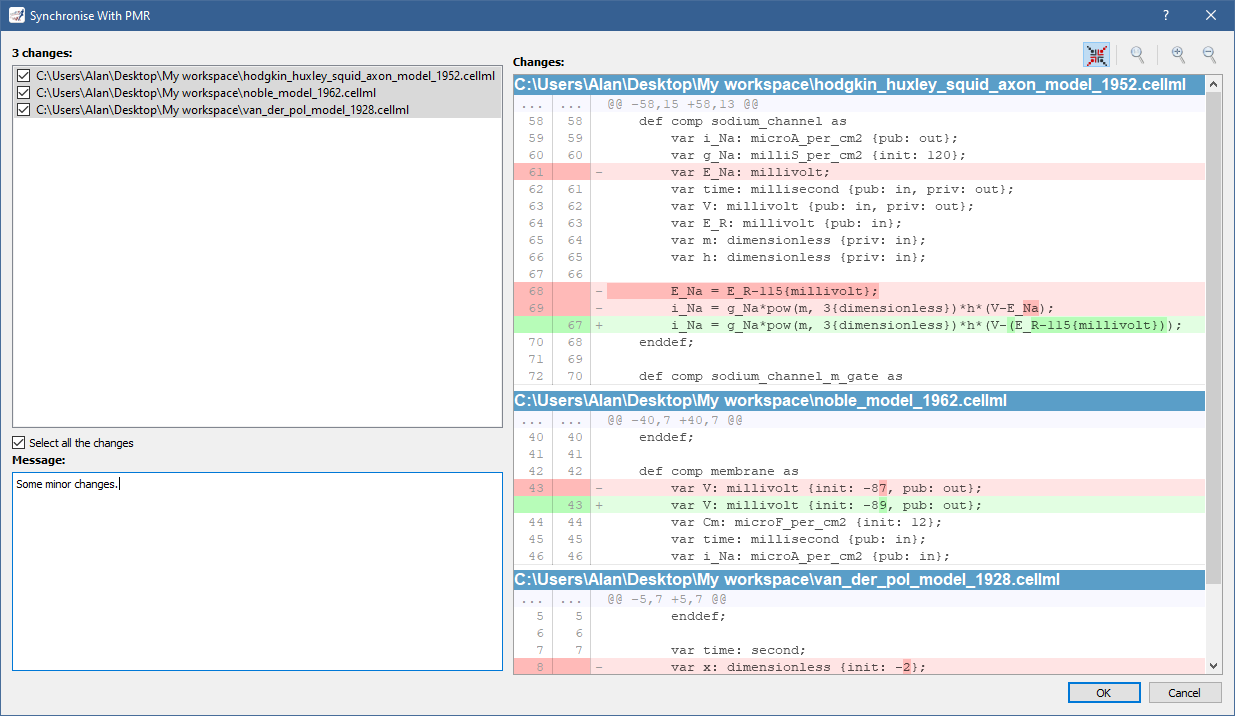
If you modify the model files and decide to resynchronise your workspace with PMR, you will see something like the following where all the model files have been selected. This allows you to see all their changes at once, be they additions (in green) or deletions (in red):
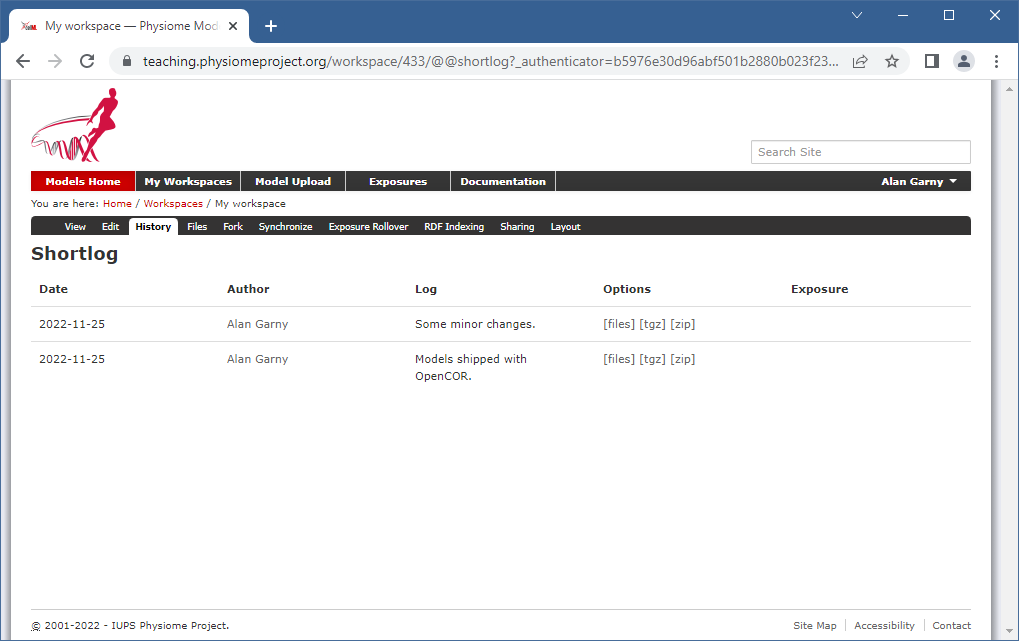
Your workspace resynchronised, you can see the history of your changes in PMR:
Tool bar
Create a new workspace Reload the list of workspaces Preferences for PMR support Log on to PMR Log off from PMR
Icons
Different icons are used to distinguish between the different states of a workspace:
|
/ |
|
Public/owned workspace |
|
/ |
|
Public/owned workspace with staged changes. |
|
/ |
|
Public/owned workspace with unstaged changes |
|
/ |
|
Public/owned workspace with conflicting changes |


Similarly, different icons are used to distinguish the different states of a file:
|
File that is clean |
||
|
/ |
|
Staged/unstaged file that has been added |
|
/ |
|
Staged/unstaged file that has been deleted |
|
/ |
|
Staged/unstaged file that has been modified |
|
/ |
|
Staged/unstaged file that has been renamed |
|
/ |
|
Staged/unstaged file which type has changed |
|
File that is unreadable |
||
|
File that has conflicts |
||
|
File that is ignored |


Note: you should always see the unstaged version of an icon. The only case where you will see the staged version is if something went wrong during synchronisation. Indeed, synchronisation is done using Git and it may be that something caused it to fail (e.g., loss of Internet connection), in which case you will likely have to fix the problem yourself, using Git.